Cozy Game Restoration First Hour: Day One Walkthrough
How the first in-game day runs: buy a parcel, unwrap it, clean the four layers in order, then shelve the cart or sell it before you end the day.
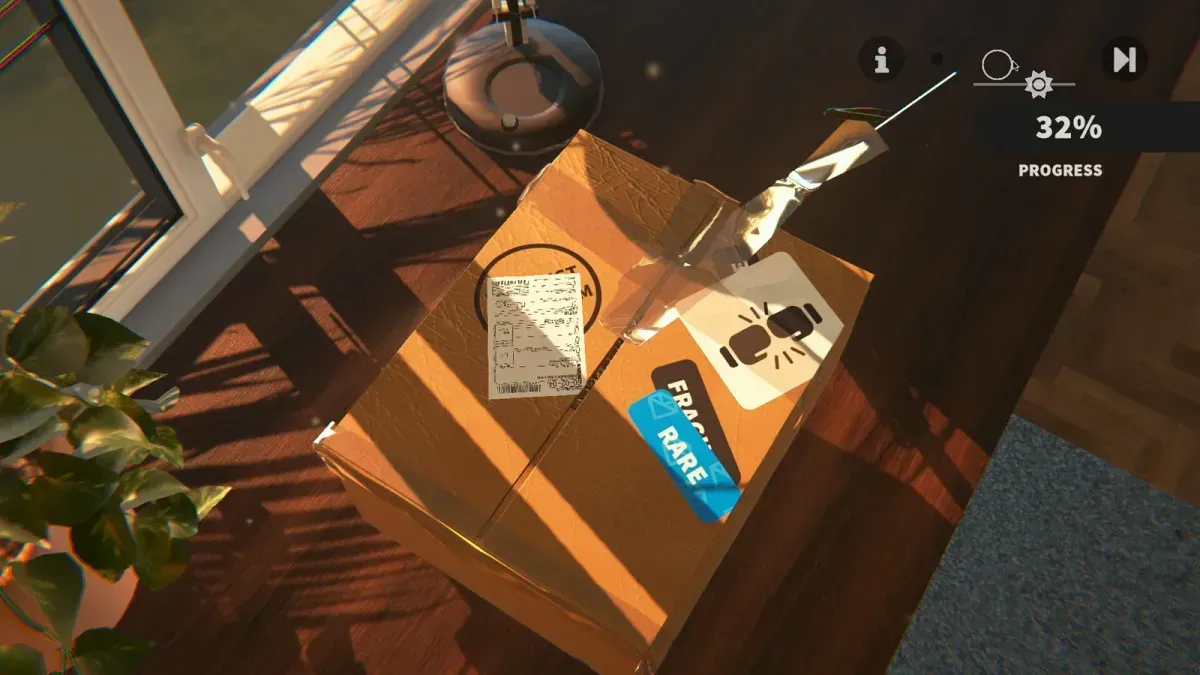
What does the first in-game day actually ask of you?
A handful of parcels arrive on the desk. Each shows its platform and genre but not the game inside, and each carries a price. You buy what you can afford, unwrap it, clean the cartridge, then choose between the shelf and a sale. Ending the day replaces whatever you left behind.
That is the entire shape of the game, and the first day is deliberately small: one or two carts, the basic tools, enough money that one decision matters. The beginner guide explains the loop in general terms; this page is the order of operations for that first sitting.
Step 1: Read the parcels before spending anything
Each parcel card tells you the platform family and the genre. It does not tell you the title, the rarity, the condition or the region. You are buying a category, not a game.
Two habits are worth forming immediately:
- Leave money in the account. Tomorrow’s parcels need paying for too, and the permanent upgrades are priced as a long-term sink.
- Buy the genre you want on your shelf rather than the cheapest box. Genre is what stacks into shelf bonuses, and the first carts you keep decide how fast your tools get stronger.
Price is not a quality signal. Rarity is rolled when the parcel opens, so a cheap box can hold a Rare cartridge and an expensive one a Regular.
Step 2: Unwrap it by hand
Peel the tape, lift the flaps, pull the cartridge out of the packing peanuts. This is a physical interaction, not a menu confirm — the box does not open until the tape is off, and the tape comes away by hand.
The peanuts are desk clutter rather than a cleaning layer. Sweep them aside or drop them in the bin beside the desk; the Bin-osaur in the corner eats them.
Look at the cart before you pick up a swab. Shell colour, sticker coverage and marker scribbles tell you which layers are coming, and a gold shell is worth noticing before you start scraping near the label edge.
Step 3: Clean in the order the tools expect
The layer order is not a suggestion. Each pass makes the next one readable:
- Scan with the UV torch. It highlights grime and displays the dirt and ink stats, so you are working from numbers instead of a flattering camera angle.
- Clear dust with the swab. Flat surfaces first, then edges. Wipe the swab on the wet pad as soon as it darkens — a loaded swab smears dirt back across the label.
- Lift stickers with heat, then tweezers. Warm the adhesive, pull slowly, and expect residue underneath.
- Dissolve ink and residue with solvent, then dry it with the heat gun held for a full five seconds.
- Polish the scratches last, slowly, because this layer punishes speed more than any other.
Tool behaviour is covered on cleaning tools; what each stain looks like belongs to damage types.
Step 4: Decide when to stop cleaning
You can finish a cartridge that is not perfect. The results screen reads the four layers separately — Dirt, Stickers, Ink and Adhesive, Scratches — and stamps a letter grade on the total, so a cart finished at 78/100/73/85 still counts; it just grades D. What the last stretch buys is the grade, and the grade is what the sale price reads.
Whether to push on is a minutes-against-margin call. A high-rarity cart justifies the extra pass, a Regular usually does not — money and selling prices the trade.
Autocomplete is on by default and clears the last sliver once every layer passes 99%, which is why a cart sometimes snaps to finished while you are still hunting a speck. It can be turned off in the accessibility settings. The thresholds are on restoration workflow.
Step 5: Shelf it or sell it
Every finished cartridge goes one of two ways.
- Shelf: the cart feeds its genre, platform and rarity into the room’s bonus panel, which raises cleaning power, surface area and how much dirt a tool holds before it needs the pad.
- Sell: the cart leaves the collection and the money goes back into parcels or upgrades.
Selling your first cart is tempting and usually wrong. One sale funds one more parcel; one shelf slot keeps paying out on every cartridge you clean afterwards. Money and selling covers the trade, and collection room explains what the panel is reading.
Step 6: End the day
Ending the day clears the parcels you did not buy and the boxes you did not open, and the game warns you before it happens. The next morning brings new parcels, a new market and a fresh rarity forecast.
Read that forecast before you end a day. It shows what the next delivery is likely to hold, and the carts you shelved today are what moved those percentages. How to read it is on rarity and shelf bonuses.
Related Articles
guides
Autocomplete Not Working at 99 Percent in Cozy Game Restoration
Autocomplete fires only when every layer passes 99 percent, so one bar at 98 keeps the cartridge open. How to find the layer that is holding it back.
guides
Adhesive Not Spawning on Discs: Cozy Game Restoration Bug
Disc cartridges could refuse to spawn sticker adhesive, leaving the ink bar unfillable. Fixed in Patch 1 and live again since 7 November.
guides
How to Change the Language in Cozy Game Restoration
The game picks a language on first boot and the gear icon reopens the list. The full set, plus why Russian was missing and when it returned.
Was this helpful?
Thanks for the feedback!