Cozy Game Restoration Damage Types and What Removes Them
The five grime layers in Cozy Game Restoration — dust, ink, discoloration, stickers, scratches — plus shell damage and regional cart differences.
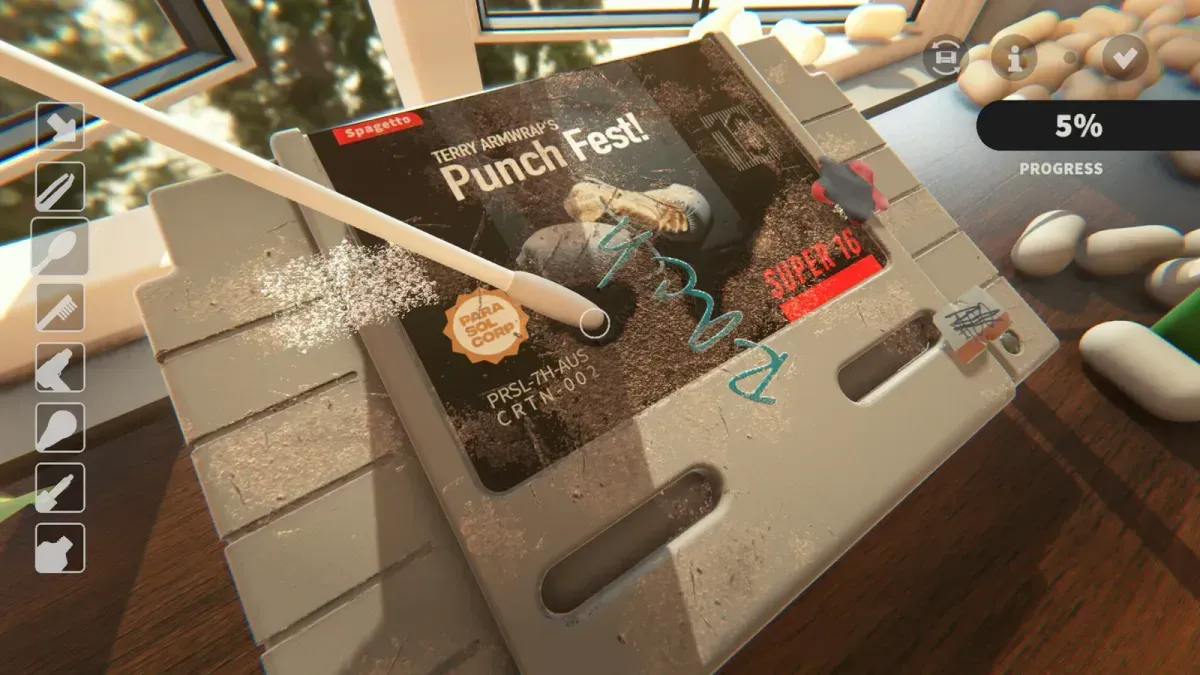
What can be wrong with a cartridge?
Two categories, and they behave differently. Grime is the layered dirt you clean off; shell condition is physical damage that cleaning does not fix. The store description lists five grime layers and separately describes carts with clean labels but cracked shells, scuffs, marker writing and adhesive residue.
| Layer | What it looks like | What removes it |
|---|---|---|
| Dust | Loose surface film, worst in seams and ridges | The surface tool; cheapest layer to clear |
| Ink | Markings that sit on the surface | The ink-appropriate tool, read via the UV stats |
| Discoloration | Yellowing or fading in the plastic | Its own tool; slow, coverage-based |
| Stickers | Paper and adhesive stuck to shell or label | Heat first (hair dryer), then lift |
| Scratches | Marks in the surface itself | The scratch tool; slow passes |
The finish screen tracks four bars rather than five: Dirt, Stickers, Ink & Adhesive, Scratches. Ink and discoloration share the adhesive bar, which is why a cart can read as clean while one of those still sits under 100%.
The exact tool for each layer unlocks as you progress, so early-game you will face layers you cannot finish yet. That is intended: leave them, come back with the right tool.
Why do layers matter more than any single stain?
Because the completion check is per layer. Autocomplete only fires when every layer is at 99% or higher, which means a cartridge can look clean and still be blocked by one stubborn patch of ink. The UV torch exists for exactly this: sweep with it, watch where the glow trails, and clear the patches you cannot see at your current camera angle.
Working layer by layer also stops the classic mistake of scrubbing a stain with the wrong tool, which smears it into a wider area instead of removing it — surfaces stretch, smear and lift as you clean.
How do I handle stickers without tearing them?
Heat. The hair dryer softens the adhesive so the sticker lifts in one piece; pulling it cold tears the paper and leaves residue behind, which is a second job. The box tape rework in the June demo build replaced the older force-based tweezer approach with a wrapping-paper feel, so expect tape and stickers to behave like a physical layer rather than a decal.
Residue is its own problem: adhesive left behind blocks the layer from reaching 99%, and it is the layer people most often mistake for “clean already”.
Does shell damage affect cleaning?
It affects reach. The developer retuned one epic cartridge from PAL to NTSC in the October demo because PAL shell ridges are hard to get into with that build’s tool strength — the shell shape decides how much of your cleaning power lands on the dirt.
So when a cartridge feels impossible, check the shell before blaming your technique:
- Ridges and seams hide grime and resist flat tools.
- Cracked shells can put dirt where no tool reaches cleanly.
- Gold and higher shells are rarity signals, worth checking before you work the label edge.
Do regional variants change anything?
Every title has a PAL and an NTSC regional variant, so the same game can appear twice with different shell shapes, sticker artwork and difficulty of access. For collectors that means the regional variant is a collection slot in its own right, not a duplicate.
The variant list per title lives on the cartridge collection page. For the tool side of this page, see cleaning tools; for the order to work in, see restoration workflow.
Related Articles
guides
Cozy Game Restoration Beginner Guide: First Hour
How the Cozy Game Restoration loop works, in order: unwrap parcels, read the grime layers, clean them off, shelf the cart, finish quests.
guides
Cozy Game Restoration Cleaning Tools and Hotkeys
The tools confirmed in Cozy Game Restoration: UV torch, hair dryer and the cleaning tools that need cleaning, plus hotkeys and toggle settings.
guides
Cozy Game Restoration Collection Room and Shelf Bonuses
How the Cozy Game Restoration collection room works: furniture placement, quest decorations, and shelf bonuses that change tool power and discounts.
Was this helpful?
Thanks for the feedback!