Cozy Game Restoration Beginner Guide: First Hour
How the Cozy Game Restoration loop works, in order: unwrap parcels, read the grime layers, clean them off, shelf the cart, finish quests.
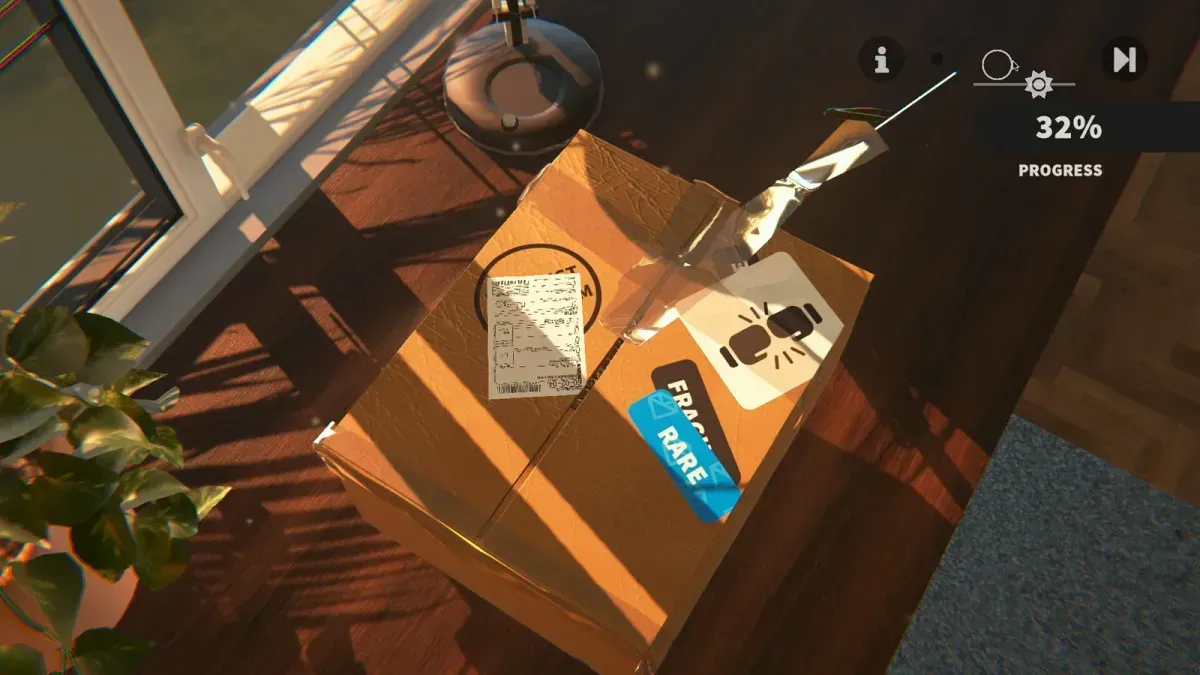
What is the loop in Cozy Game Restoration?
Each cartridge goes through five stages: parcel, unwrap, clean, shelve, quest. You pick a mystery parcel from the stack, peel the tape and open the flaps, find the cart inside, clean every layer of grime off it, then place it on a shelf in your collection room. Shelving a cart is not decoration — the games you display feed the shelf bonuses that change how your tools behave.
The demo teaches exactly this loop over its first two cartridges. If you have played the demo, the full game repeats it with 108 titles instead of seven: see demo versus full game.
Step 1: Buy a parcel and unwrap it
Parcels arrive sealed with tape and wrapped in paper, and opening them is a physical interaction rather than a menu. Peel the tape, lift the flaps, and check what the wrapping hid — the game deliberately makes the opening tactile, and the parcel preview tooltips tell you what you already know about a box before you buy it.
Two habits worth forming early:
- Read the parcel tooltip before spending. It shows what is known about the cart inside, which is more than nothing and less than everything.
- Open everything you buy. An unopened parcel takes up space and teaches you nothing about the rarity spread.
Step 2: Work out what is actually wrong with the cartridge
Cartridges are procedurally dirtied, so no two are the same. The store description names five grime layers — dust, ink, discoloration, stickers and scratches — and says each requires a different tool. Physical damage is separate: clean labels on cracked shells, scuffs, marker writing and adhesive residue all appear.
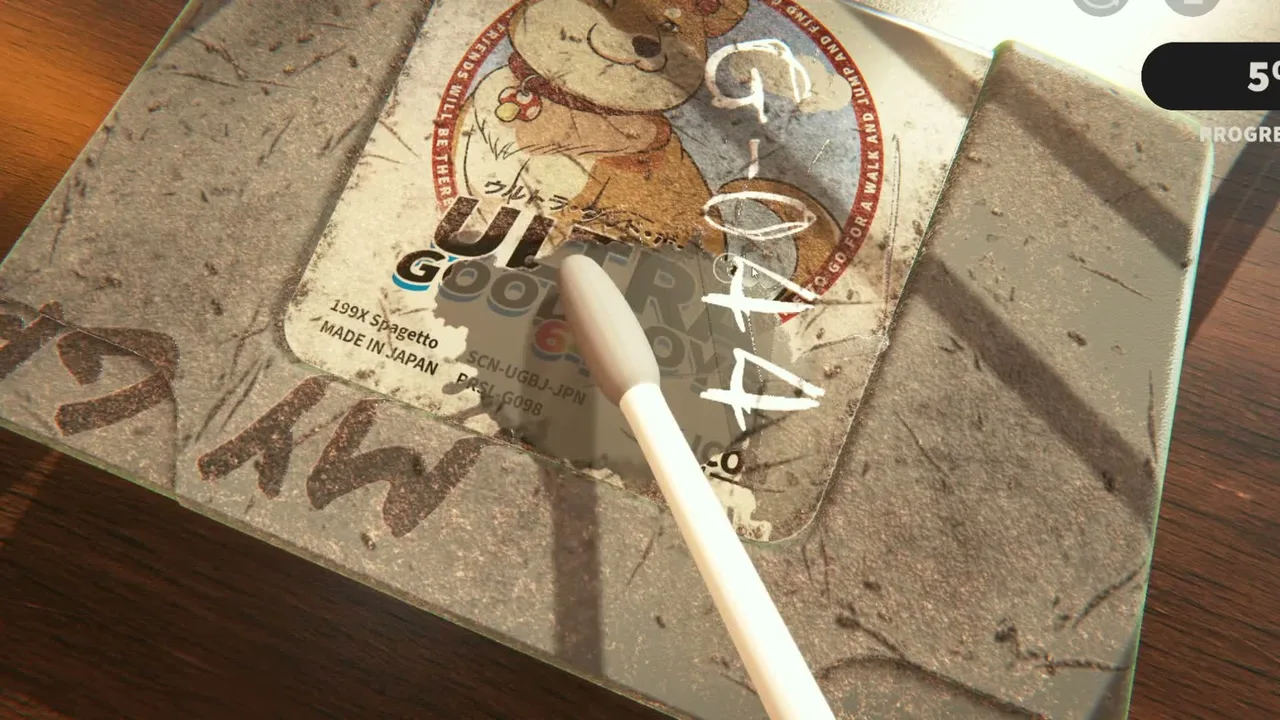
The label is where the layers show up first: handwriting, dust and residue over the artwork. Official game imagery © Parasol Corp.
Turn the UV torch on before you start cleaning. It highlights grime and leaves a glowing trail on dirt, so you can sweep the whole cart, switch tools, and come back to the patches you missed instead of guessing. The same torch exposes dirt and ink stats while it is active.
The full layer breakdown is on the damage types page.
Step 3: Clean in layers, not in a panic
Nothing in this game has a timer, so the correct pace is slow. Work one layer at a time: lift the loose surface layer first, then the stains, then anything stuck to the label. Surfaces stretch, smear and lift as you work, so expect a pass to move grime around as well as remove it.
Two quality-of-life settings carry most of the friction reduction:
- Tool toggle press (in the options and in-game options menu) so you are not holding a button for an entire cartridge.
- Autocomplete threshold at 99% per layer, which clears the last few pixels of dirt automatically once every layer is above 99%. It can be turned off in Accessibility if you prefer to finish by hand.
When a tool stops working, it is dirty, not broken. Clean it and the cutting power comes back — see cleaning tools.
Step 4: Shelve the cartridge
Shelving is where the macro game lives. Games you display influence the cleaning power and properties of your tools, and the shelf bonus system feeds tools, economy and discounts. The developer compares it to swapping wheels and bodies in a kart racer: the collection you build changes how the next cartridge cleans.
The practical version for a first session: group similar genres together rather than spreading your best carts across the room, and check the shelf unlock list — it is visible in the demo, so use it as a shopping list.
Step 5: Cash the quests in
Collection quests run in the background while you clean. They ask for things like three puzzle games or two rare platformers, and some are tied to the in-game calendar, such as having four sci-fi games on the shelf on 7 November. Each completed quest gives a gift containing a decoration or cosmetic for the room.
That is the progression spine: clean carts, shelve them, complete quests, decorate. Read quests and rewards for the quest types and collection room for what the decorations are for.
What can go wrong in the first hour?
Very little, by design. There is no fail state, no timer and no penalty for leaving mid-cartridge. The three real mistakes are all about focus:
- Cleaning the whole cartridge with one tool instead of layer by layer.
- Ignoring the shelf because the room feels cosmetic.
- Buying upgrades before parcels in the demo, where upgrades are locked at $9,999 to stop exactly that.
Start with the tutorial and finish both halves — the cleaning half and the collection-room half — before you free-play. The second half is where the shelf system is explained.
Related Articles
guides
Cozy Game Restoration Cleaning Tools and Hotkeys
The tools confirmed in Cozy Game Restoration: UV torch, hair dryer and the cleaning tools that need cleaning, plus hotkeys and toggle settings.
guides
Cozy Game Restoration Collection Room and Shelf Bonuses
How the Cozy Game Restoration collection room works: furniture placement, quest decorations, and shelf bonuses that change tool power and discounts.
guides
Cozy Game Restoration Damage Types and What Removes Them
The five grime layers in Cozy Game Restoration — dust, ink, discoloration, stickers, scratches — plus shell damage and regional cart differences.
Was this helpful?
Thanks for the feedback!